HTML, CSS, PHP and MySQL in WP

I've been wanting a visual that explains how WordPress works and at the same time explaining what HTML, CSS, PHP and MySQL are. Couldn't find exactly what I wanted so I decided to make one.

WordPress with HTML, CSS, PHP and MySQL

WordPress with HTML, CSS, PHP and MySQL

I found several really good websites for a better understanding. The best is by Lê Nguyên Hoang, Languages of the Web, which has a great history included. The other resource you Really want to use and peruse is http://www.w3schools.com/. They have the clearest explanations of each language and what it does.

  • HTML - hypertext markup language. HTML is text that is "marked up" to make web pages. A browser makes the html it pulls up into web pages with the use of CSS, PHP and MySQL.
  • CSS - cascading style sheets. Styles tells the browser how to display the HTML. One style sheet can set style for the whole website. Saves time for the browser.
  • PHP - hypertext preprocessor. PHP is a language of little scripts, little instructions that tell the servers and computers to do different actions within a web page.
  • MySQL - structured query language. MySQL is a language that interacts with the database on your server loaded by WordPress. Most of the information for your website is stored in this database.

Plugins and Widgets

PLUGINS

Plugins – are small applications that run within WordPress to make things happen on your website. WordPress.org now offers 32,318.

  • They can be loaded right from your dashboard.
  • They are searchable right from your dashboard (by function ie contact form)
  • Rated by stars, and you can click “Details” to read more about them including the number of people that have uploaded them.
  • Plugins is its own category on the main dashboard.
  • Behind the scenes plugins help with
  • ------search engine optimization
  • ------backups
  • ------things to make it all work better
  • On website plugins create
  • ------slideshows of images
  • ------contact forms for visitors
  • ------things to make site better for visitor


WIDGETS

Widgets are plugins that do something the public can see or interact with; image, embedded video, comments. Widgets also are made of built-in application code. WordPress has a number of them already loaded with each theme. To see these widgets go to Appearance on the dashboard and then go to Widgets. Usually these widgets are preloaded into the "footer" or "sidebar" area of your WordPress. In order to get rid of them go to Appearance, Widgets and drag them out of the area where they are over left. I think widgets were created so that WP developers could give new WP users basic capabilities that all bloggers wanted (back in the day) like a post listing in footer, or embed a video.

Often a plugin will create a widget to use in a post or page. Example Metaslider the plugin (downloadable)  creates a metaslider widget that can be added to a page. 

MOST USEFUL PLUGINS [MY FAVORITES CURRENTLY]

Page Builder by SiteOrigin

Page Builder by SiteOrigin

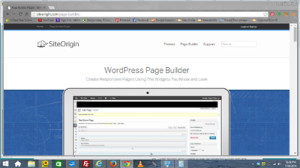
Page Builder by SiteOrigin easily gives you the ability to become more creative by laying out your pages and posts into columns. Then using different widgets in those columns to expand the look of your posts.

Black Studio TinyMCE Widget

Black Studio TinyMCE Widget

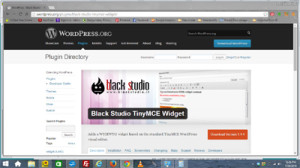
Black Studio TinyMCE Widget - This little visual editor widget works along with Page Builder to allow things like CENTERING images! Look for it in Widgets as "Visual Editor" and open it in a column of Page Builder to enable you to bold, italicize, create lists, center - not only text but images.

Meta Slider

Meta Slider

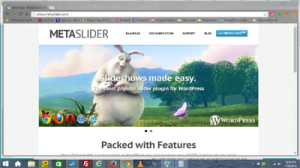
Meta Slider allows you to create any number of slideshows of images. Each slideshow can be custom sized for location in the blog or on a page.

WordPress SEO by Yoast

WordPress SEO by Yoast

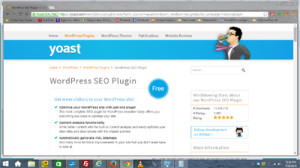
WordPress SEO by Yoast Search engine optimization made easy. Sitemaps created automatically. Assist you with fill in keyword checks at the bottom of every post and page. Highly regarded!

Google Analytics for WordPress

Google Analytics for WordPress

Google Analytics for WordPress - Another Yoast plugin that is important to have. Setting up a Google Analytics account (free) shortly after you begin helps you track your website's progress.

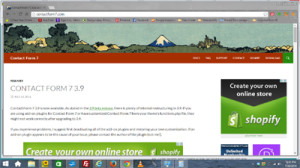
Contact Form 7

Contact Form 7

Contact Form 7 - Still the best most used Contact Form on WordPress. Create an easy way for your visitors to get in touch with you.

UpdraftPlus Backup and Restoration for WordPress

UpdraftPlus Backup and Restoration for WordPress

UpdraftPlus Backup and Restoration for WordPress - Another highly regarded plugin for the backend of your website. Easily backups up your database and website to a location of your choice. I chose my Dropbox account.

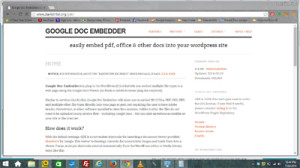
Google Doc Embedder

Google Doc Embedder

Google Doc Embedder - You can give visitors access to pdfs, powerpoints, etc. without their having to have programs. Optional downloading also.

NO WORRIES

Don't worry about getting every plugin and widget you are ever going to use the first time you sit down to work on your WordPress website! You will realize you want one when you want to do something on a new page that you've never done before. Check first on the WordPress.org plugins page to find the perfect tool for the fun new task you want to do. Or maybe you will go to a WordPress meetup and someone will recommend this great new plugin that brings you infinite traffic to your website. If you don't like it you can always deactivate and delete. I suggest that you look for ones that have high ratings and have been downloaded often. That way they likely work. Also I always watch for ones that are compatible with the most recent WordPress (which is 3.9.1). 

Add Images

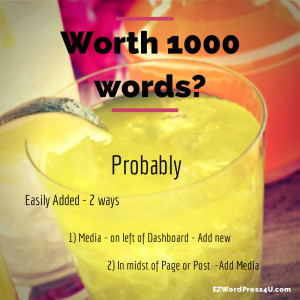
Worth 1000 wordpixlr_

Great, Free, EZ to use Online Graphic Tools

  • Canva.com - cool, hip, with templates, free and cheap photos to use
  • Pixlr.com - photo editor similar to Photoshop, will open psd files, layers, GREAT
  • Adobe Kuler - most fun color wheel tool, RGB and Hex codes for background matches

It is easy to add images to your WordPress website

1) Go to Media on the left of your WordPress dashboard and upload a number of pictures you want to use in your website or

2) Just "Add Media" as you are typing along - as I did with this image.

How to get them ready to add to your WordPress website is almost as easy!

How to get your photos ready to upload to WordPress

  1. Go to Pixlr.com (free online editor)

  2. Open the image

  3. On top toolbar click Image, Size (if it is from a digital camera it will be Big - 3264x2448)

  4. Change the Width pixels - probably to between 600 to 800 [explanation below]

  5. Pixlr automatically changes Height – Click OK

  6. File, Save – Name - Quality of 80 to 90 – Click OK

  7. Now you have a file ready to upload to your WordPress website.

  8. Continue reading to end of blog for more explanation.

AHHHHHaaas About Images

For years I've been trying to understand images for websites. Something didn't make sense. Found it while I was writing this blog for you. It's not dpi it's pixels! The old way of thinking about photos for the internet was dpi – 72 dpi. It was based upon the requirements for printing (back in the day, think Macs and Imagewriter printers circa 1980s).

72 dpi use to be standard for www, 300 dpi for photos and 600 for fine art printing.

Fast forward to now - just think pixels not dots – same critter cuter name. Pixels are what video monitors display. Take the recommended resolution of your computer screen (mine's 1366) and divide it by the acutal width in inches of your screen (mine's 13.5). Thus my computer is actually viewing 101 pixels per inch.

FIRST size your photos by pixels – in Photoshop or an online editor Pixlr.com (free and fun). Photos from my Iphone are 3264 x 2448 (8 MP) 22.9MB HUGE

Monitors these days view about 100 pixels per inch. 100 pixels per inch is an easy number to remember and makes sizing simple.So for websites we FIRST size photos by pixels 450 x 600 pixels would be a 4.5 x 6 inch photo at 100 dpi. However uncompressed this file was still 791 kb. Too big for websites to quickly and easily load – especially if you have very many of them.

THEN we compress that photo to lower the file size – Pixlr does it automatically by saving. In Photoshop if you "Save for the web" it will do the same thing.

We compress that pixel size photo so that the kb is smaller. When compressed this file became 94kb in PS and 120kb in an online photo editor. Which tells me Pixlr automatically compresses for web.The pixel size will still be 4.5 x 6 inch, the difference in quality isn't noticeable.

You will notice WordPress uses pixels when they talk about images. In your dashboard go to Settings, Media and you will see that the Thumbnail size is 150 px by 150 px, the Medium size is 300 px by 300 px, and the large is 1024 px by 1024 px. (No your pictures will not all have to be square... that is just maximum.)


from Pixlr changed image size to 1080 x 810 ended up with 240 kb

from Pixlr changed image size to 1080 x 810 ended up with 240 kb

Edited this in old PS 100 dpi, 1000x750 saved as jpeg but didn't save for web.... 736 kb

Edited this in old PS 100 dpi, 1000x750 saved as jpeg but didn't save for web.... 736 kb

PS 10" first then saved for web 327 kb

PS 10" first then saved for web 327 kb

I can't see any difference between 1, 2 and 3. Yet 1 is almost a 1/3 the size of the next one. Go with Pixlr or with save for web.

Pages and Posts

Pages and Posts

Newbies often wonder what the heck are pages and posts? Pages are the main, relatively non-changing (static) pieces of your website. Welcome, WordPress How to Blog, and Lindy Flynn are the Pages of this website. Posts are the articles that are ‘posted’ on the Blog page, newest on top, organized by categories and tags. Posts can be even longer than pages; they can go on and on, but can be shortened on the Blog Page with a “Continue Reading” link to the full article. The article “Pages and Posts” is a post.

Pages are the menu items on your website with links on the menu bar. Posts are listed under Recent Posts.

Click on the pictures to make instructions bigger

I wanted to try visuals for the How To part of adding Pages and Posts to your WordPress website. So if you click on the pictures to make them bigger you should easily be able to read the instructions.

Please let me know what you think! Thanks.